
If you're looking to make a homemade fudge recipe like your grandmother used to make, then look no further. This traditional fudge recipe from Hershey's originated in the 1960's and is still one of the most popular and requested recipes around. It's rich, full of chocolaty flavor, and perfect for the holiday season!
Jump to:
✔️ Quick Recipe Overview
Why This Is The BEST Old Fashioned Fudge Recipe: This is an original Hershey's fudge recipe so you know it's amazing! I've added nuts and peppermint for added flavor, as well as some additional tips to help you make this classic fudge recipe a success!
How Long It Takes: 3-4 hours (this includes the time it takes for the fudge to set.)
Equipment You'll Need: candy thermometer
Everyone loves a good fudge recipe. Just like these Magic Bars, fudge can be very versatile and made with peanut butter, marshmallows, cream, caramel, and other favorite flavors. And while those recipes are absolutely amazing, so is an old fashioned simple fudge recipe that reminds you of the kind your grandparents used to make.
Let me start out by saying that this is a rich cocoa fudge recipe. It's made with cocoa powder, sugar, and butter - not chocolate morsels and cream. So if you are looking for that gooey fudge recipe, then keep looking because this is not it. This is cocoa powder based so the consistency is going to be a bit more firm.
And while we are at it, let's be honest about how difficult it can be to make old fashioned cocoa fudge. While there are a lot of recipes out there that claim to be "easy to make", it's important to note that fudge in general is difficult to make. It's extremely finicky and this particular recipe is not very forgiving. The recipe is just as finicky as making macarons and petit fors. This is an expert level recipe so if you are really good at precision when it comes to baking or making homemade candy, you're going to love this one.
The key to making a successful batch of fudge comes down to the temperature during both the heating and cooling process. The difference of a single degree can significantly affect the final texture. Fudge moves fast so attention to detail matters. My aunt and my dad have been making this particular recipe since it came out in the 1960s. It's tried and true and an old-timey family favorite that I love making every holiday season. When I first started making this cocoa powder fudge, I ruined several batches. Fudge is candy and it takes a lot of practice and precision. But once you master this recipe, you can make just about any kind of candy!
ℹ️ Why This Recipe Works
1. Even though this is categorized as expert level, this fudge recipe is delicious. It's been around since the 1960s and that's saying something!
2. It's a versatile recipe and can be easily adapted to add in many types of nuts, peppermint, flavored extract, and marshmallow cream.
3. The sugar and fat act as a preservative which allows the fudge to be made ahead of time and stored for several weeks!
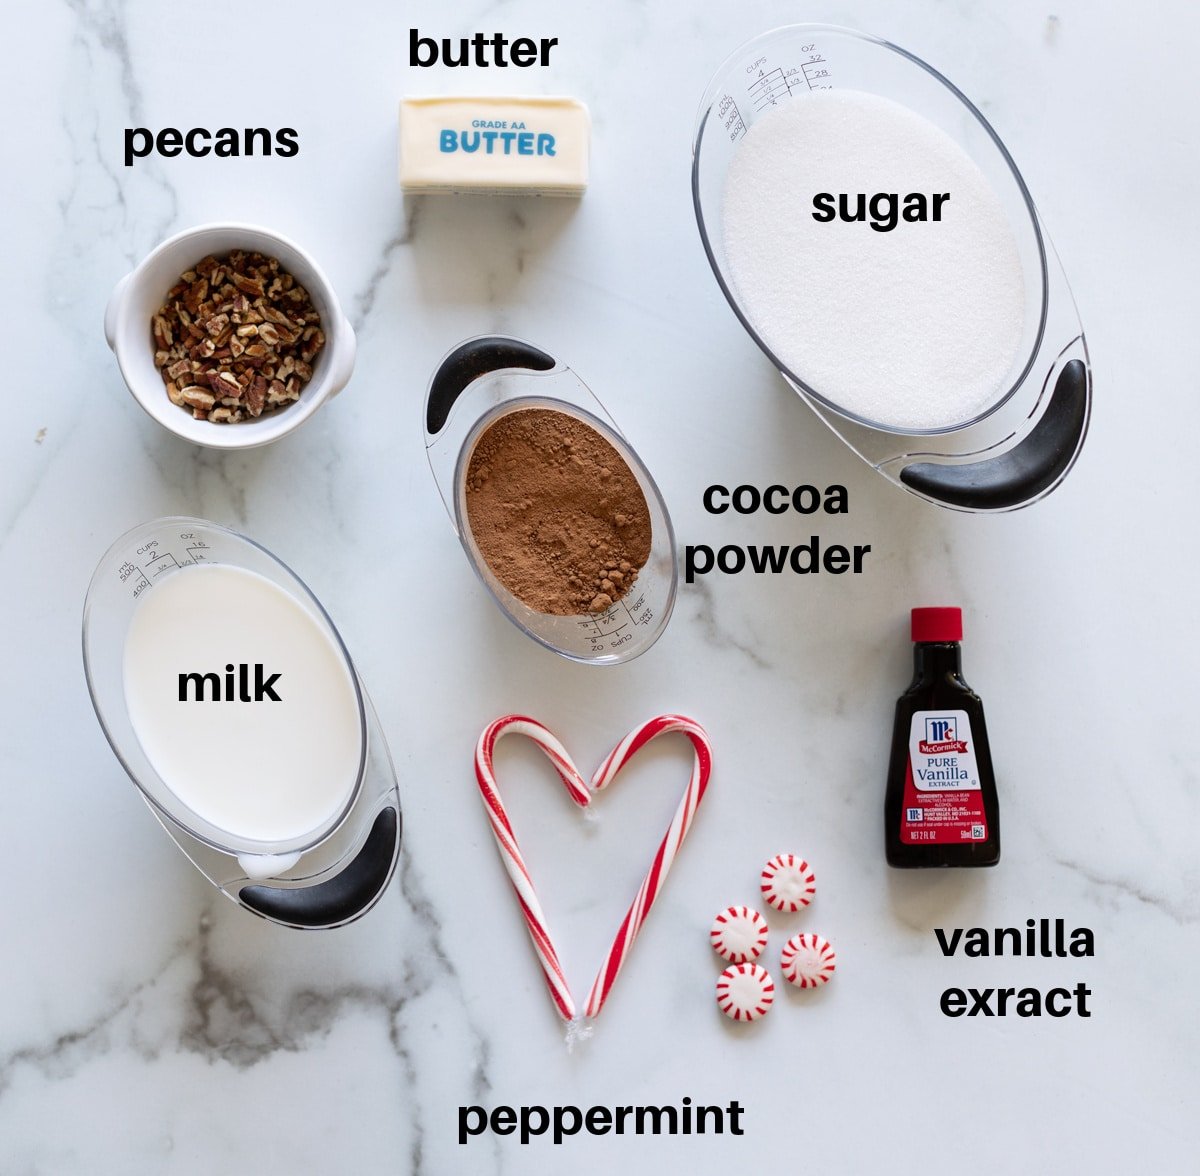
🛒 Ingredients You'll Need
A lot of fudge recipes call for chocolate morsels or wafers as well as some type of cream. Since this is an original recipe, we're using Hershey's cocoa powder, granulated sugar, butter, milk, and vanilla extract. The pecans and peppermint are optional ingredients but I love how they taste in this recipe. I recommend using whole milk, but 2% also works well. You can use either unsalted or salted butter. If you use unsalted butter, add ⅛ teaspoon of salt to the recipe to slightly cut the sweetness. If you're using salted butter, there's no need to add additional salt.
📋 Step-By-Step Recipe Instructions
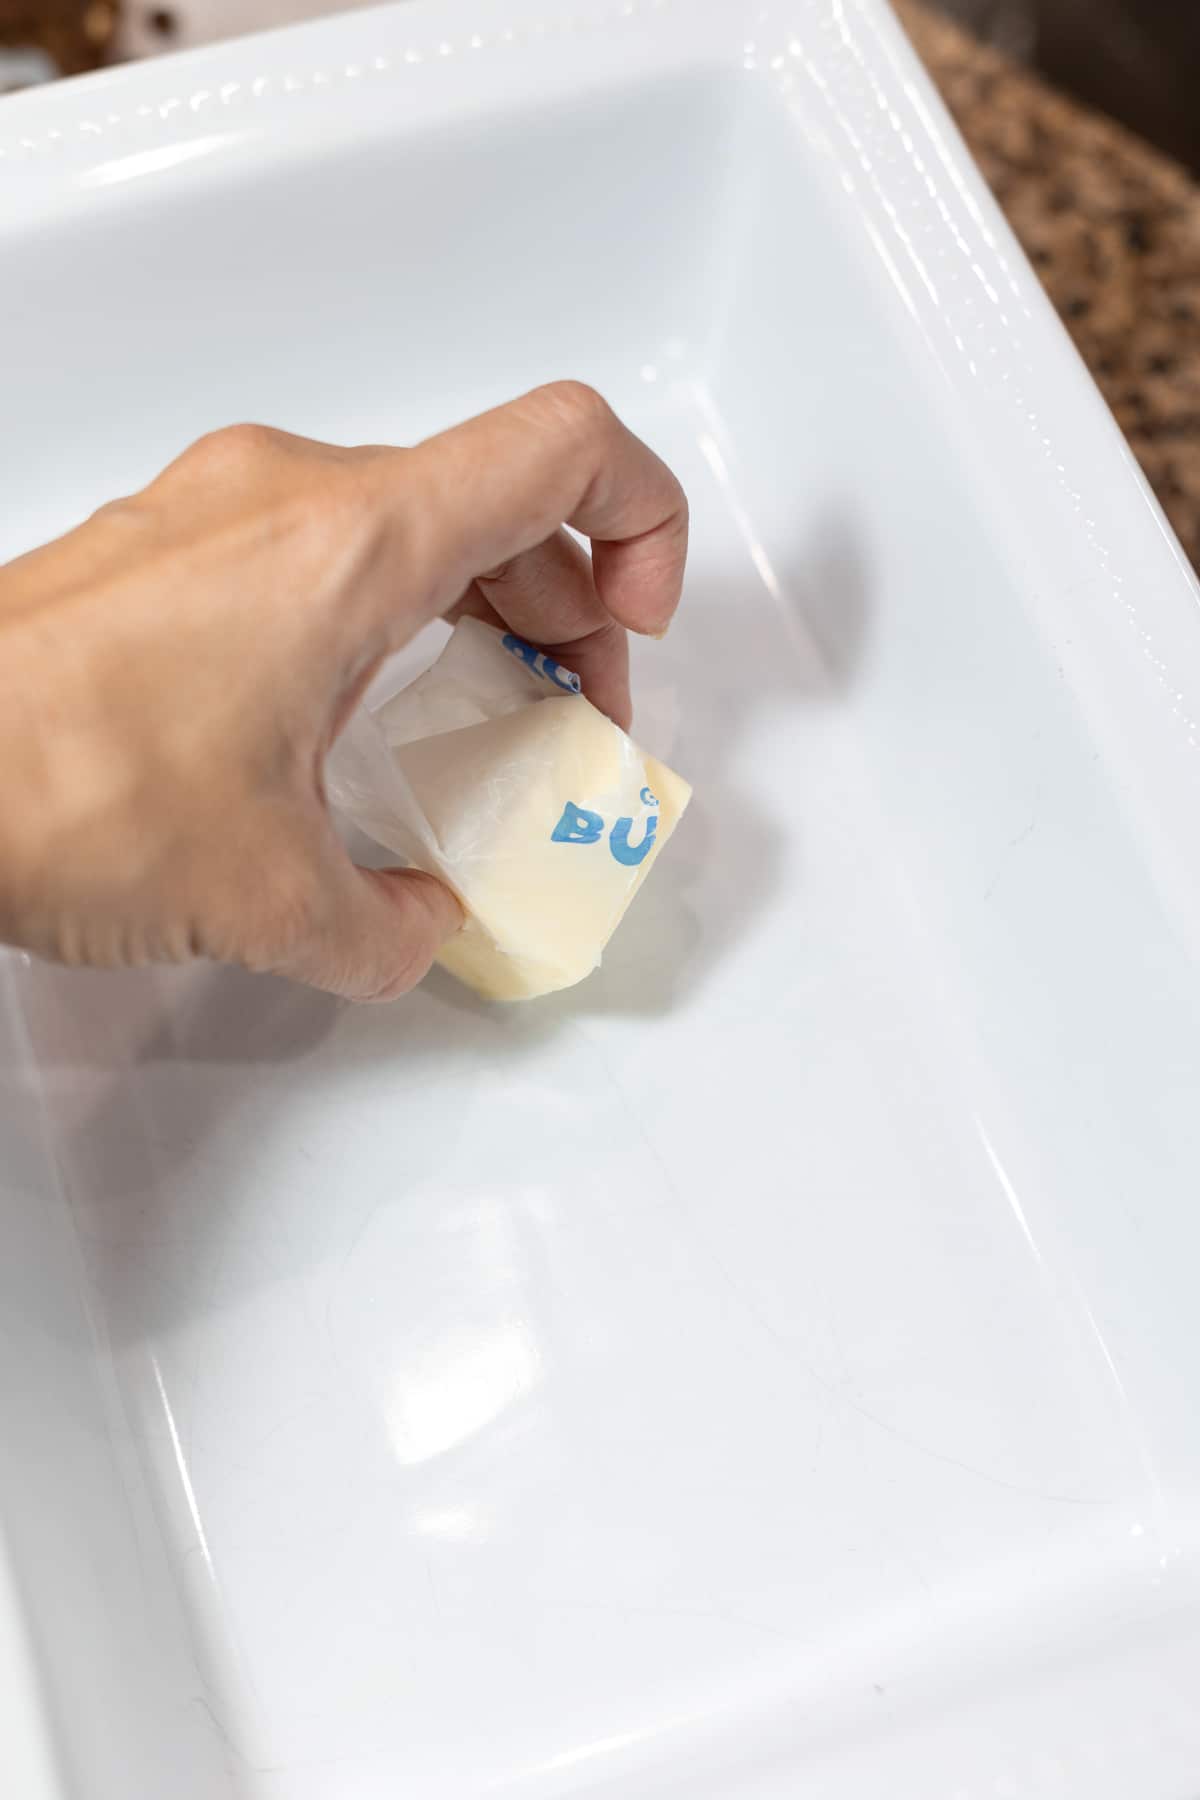
Start by buttering the bottom and sides of an 8-inch square baking pan with butter. Expert Tip: You can skip the buttering step altogether and line the dish with either aluminum foil or parchment paper.
In a large saucepan, add the sugar, cocoa powder, and salt.Mix together. Next, add in the milk and stir until well combined. Set the stovetop burner to medium heat and continue to stir.
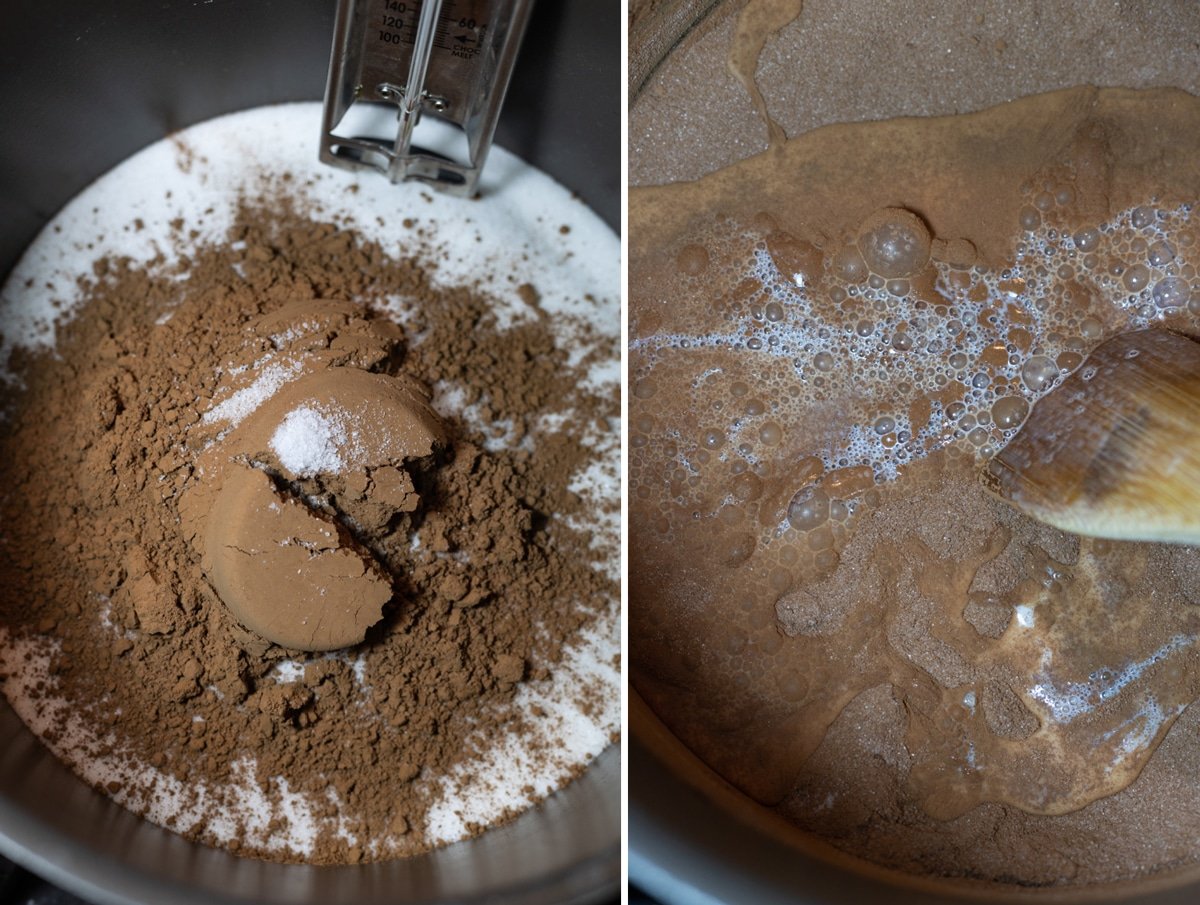
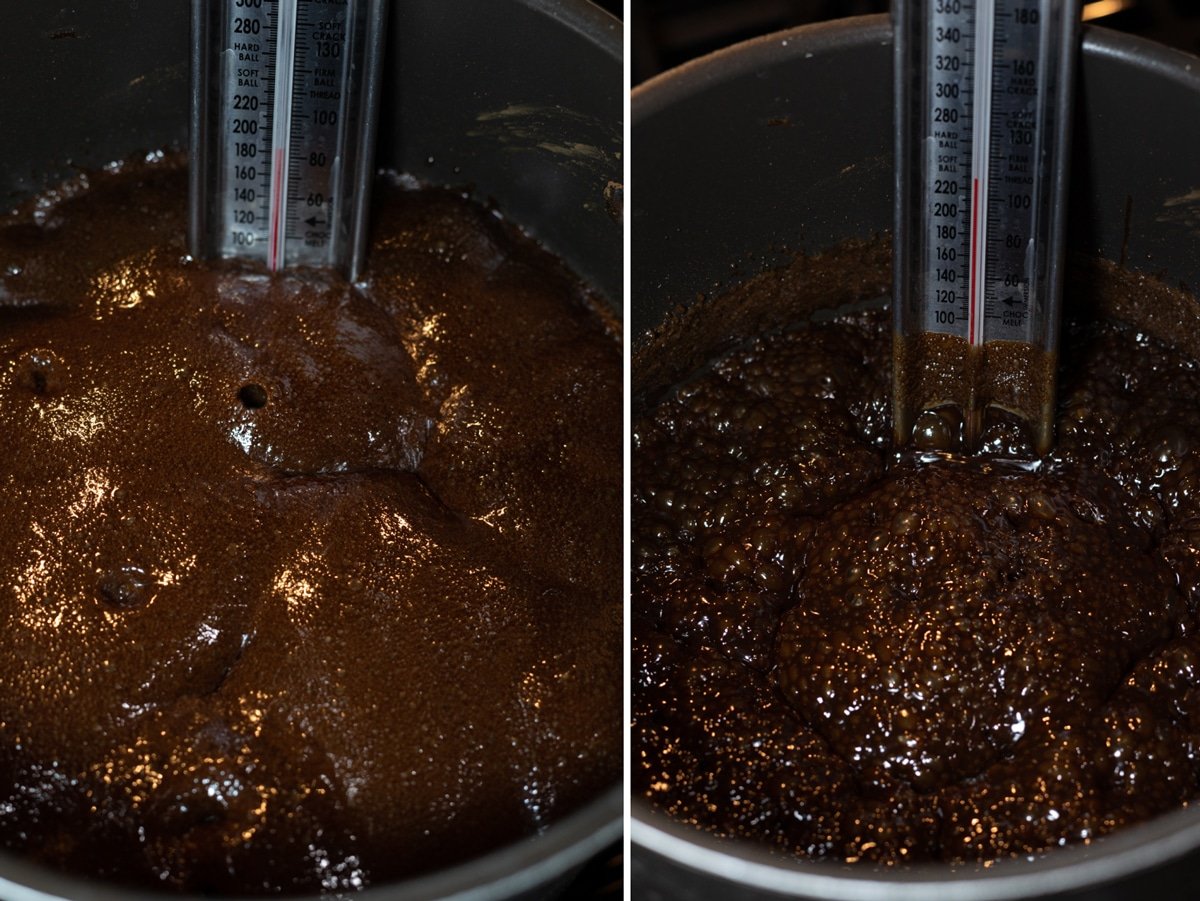
Constantly stirring, allow the chocolate to get hot and come to a full rolling boil. Once it's at a full rolling boil, stop stirring and add the candy thermometer to the saucepan, ensuring the bulb of the thermometer isn't touching the bottom of the pan.
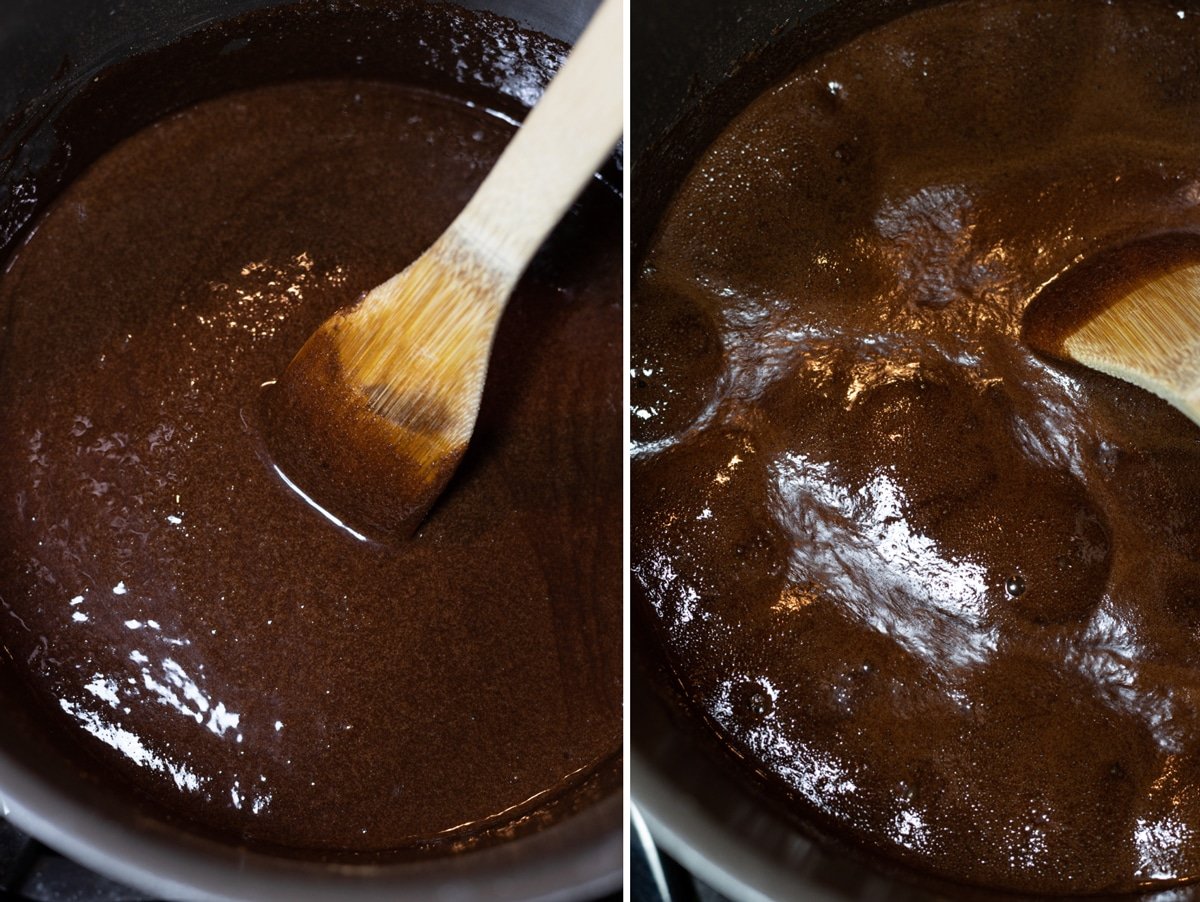
Let the chocolate continue to boil, without stirring, until the mixture reaches exactly 234°F on the thermometer.
Expert Tip: If you don't have a candy thermometer, use either a meat thermometer or you can drop a small amount of chocolate into very cold water. If it forms into a soft ball that flattens when removed from the water, it has reached the right temperature.
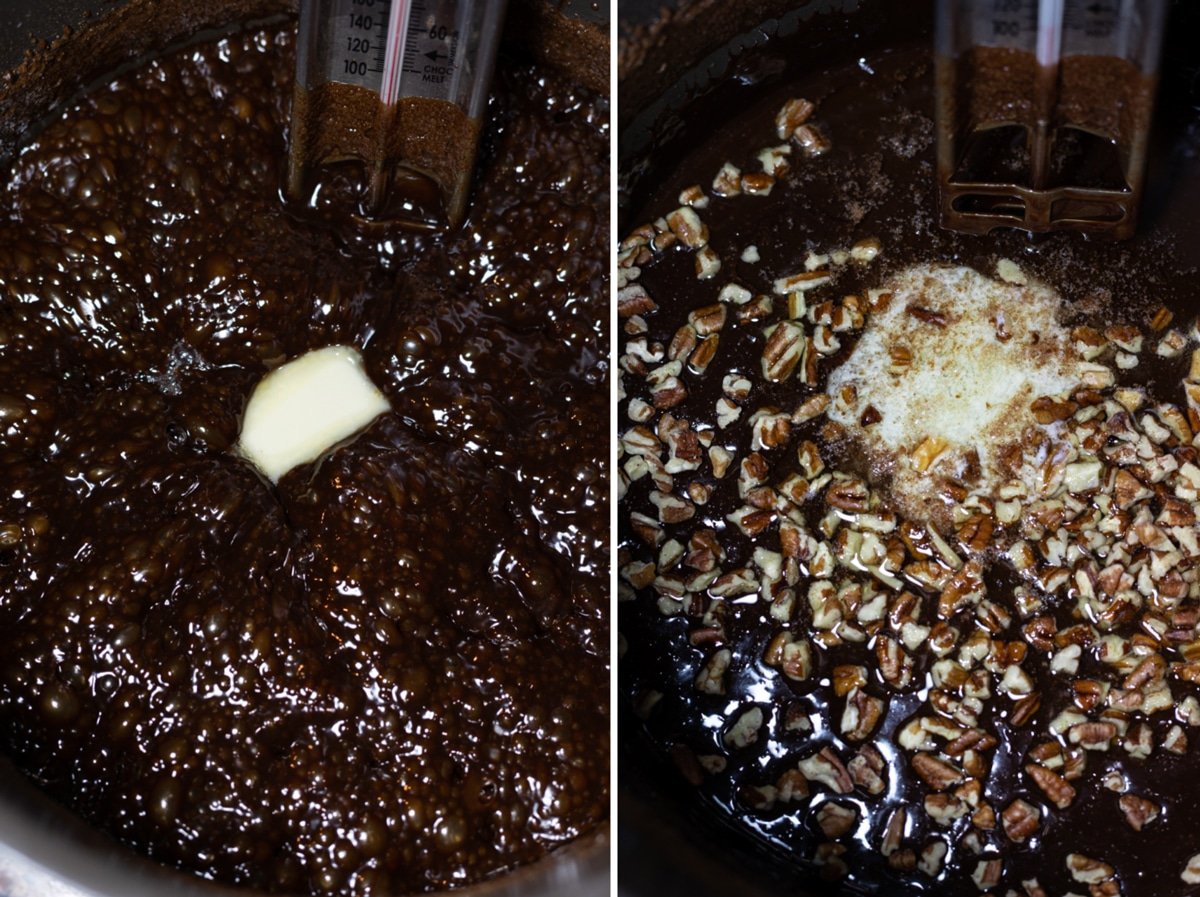
Remove the saucepan away from the heat and set it aside. Add the cold butter and vanilla extract and chopped nuts (optional); do not stir. Let the fudge cool at room temperature, without stirring, until the mixture reaches 110°F.
WANT TO SAVE THIS RECIPE?
Expert Tip: Right when the mixtures reaches 234°F, remove the thermometer from the saucepan. Rinse it in very hot water so the chocolate melts off. Let the temperature start to naturally fall. After 2-3 minutes, put the thermometer back in the cooling chocolate ensuring the bulb does not touch the bottom of the saucepan.
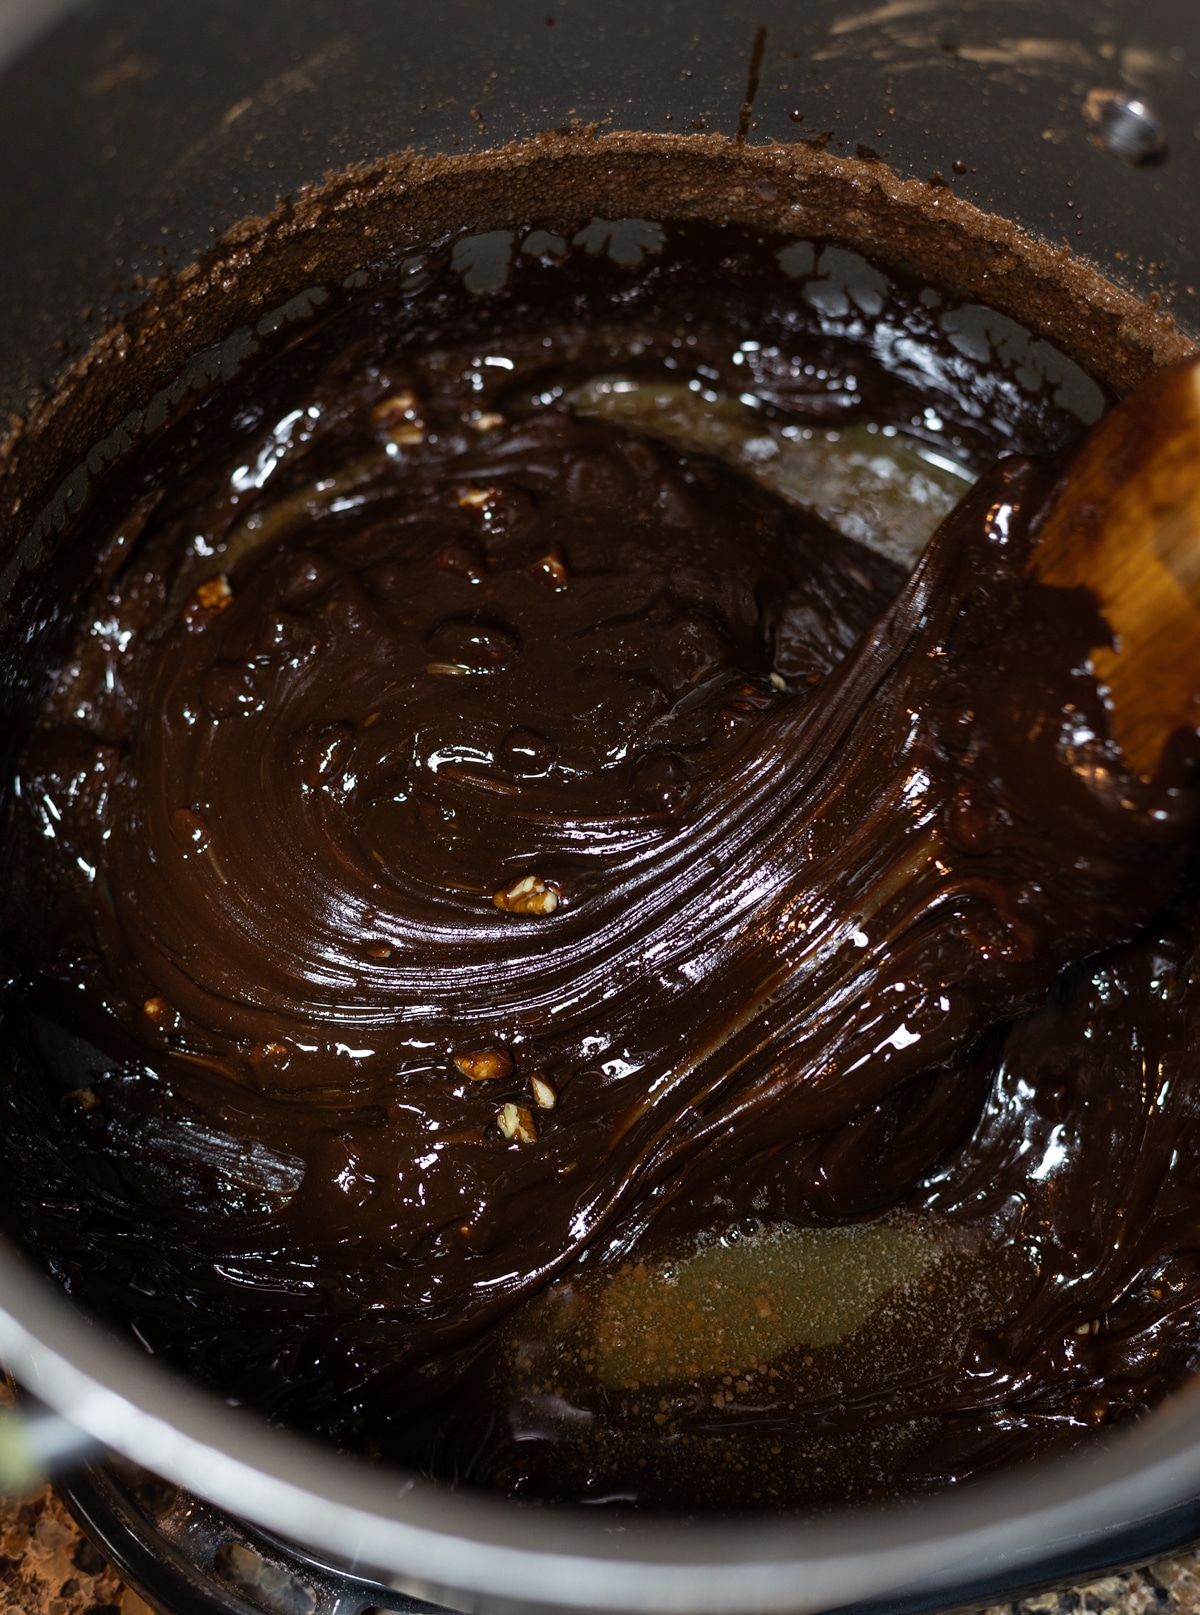
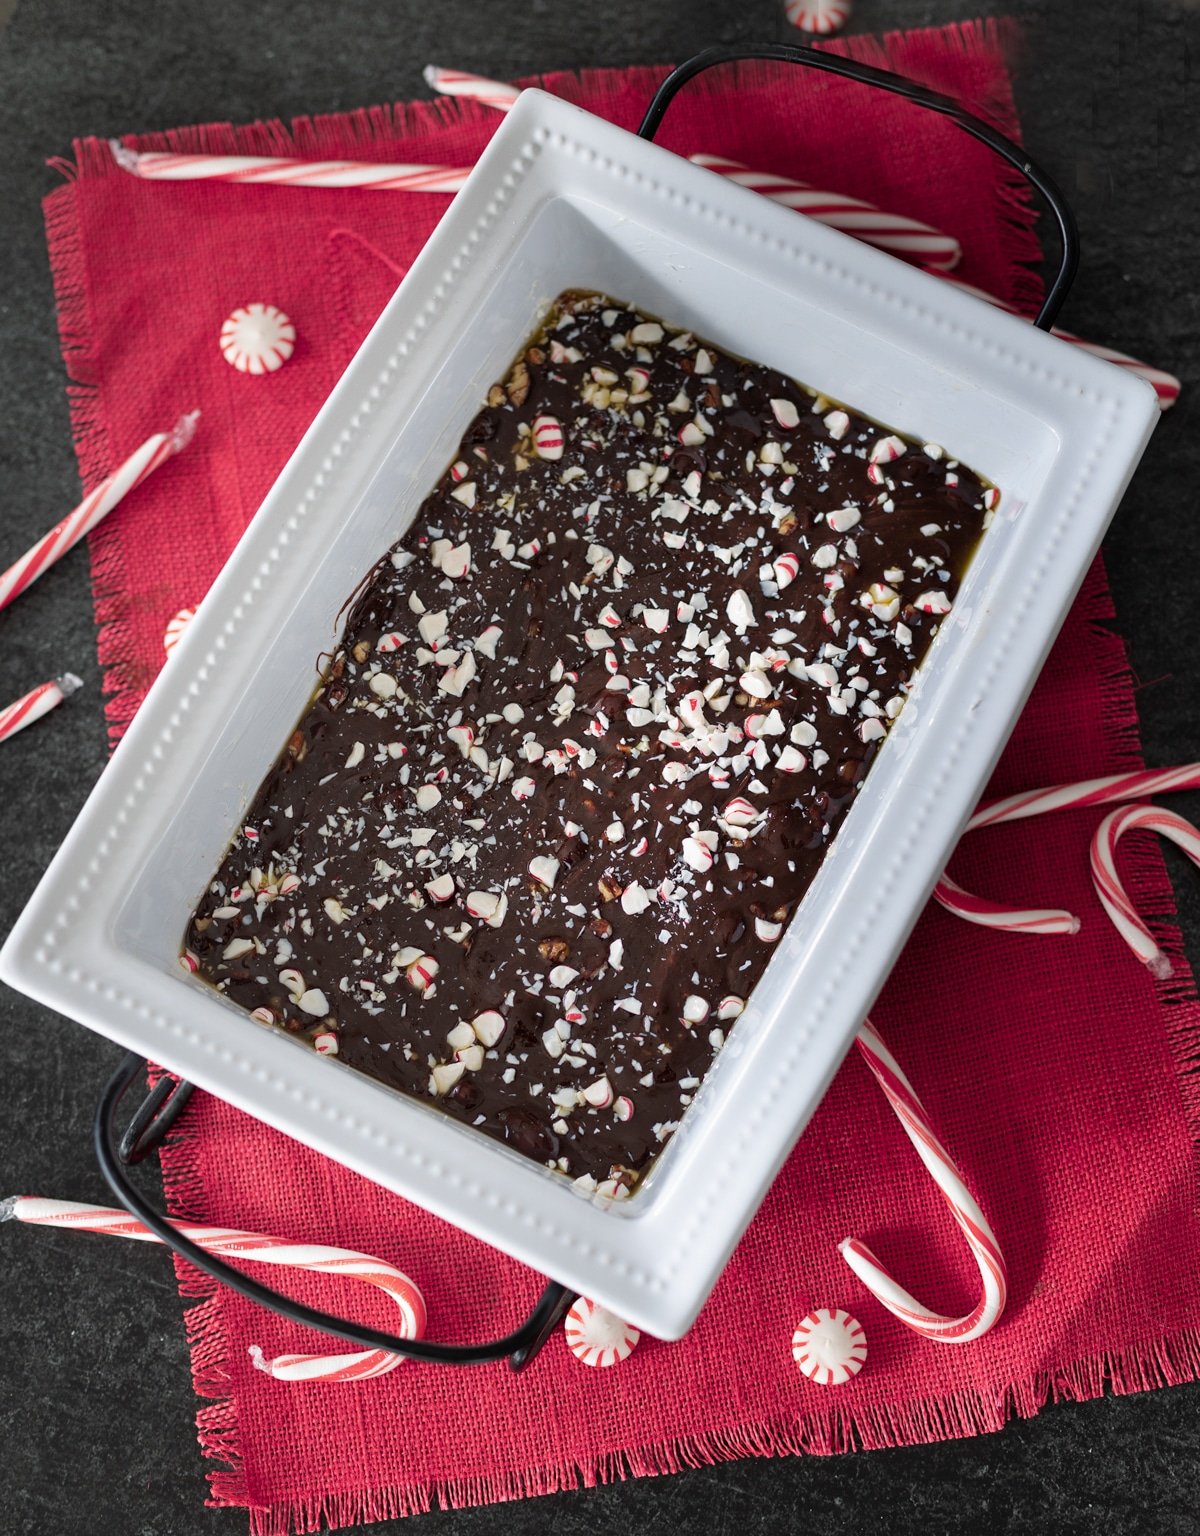
When the fudge is at precisely 110°F, quickly stir it with a wooden spoon until it starts to thicken and just begins to lose some of its gloss. Important Note: You only need to do 4-5 hard stirs. It will start to thicken very quickly. Right before it starts to thicken, quickly spread the fudge in the prepared pan and let it cool completely.
Expert Tip: Timing is crucial during this step. As soon as the fudge cools to 110°F, stir the nuts, butter, and vanilla fast and then pour the fudge into the prepared dish. As soon as you start stirring, it's going to thicken very quickly so be ready to get it into the pan at the first sign of thickening.
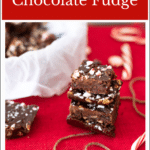
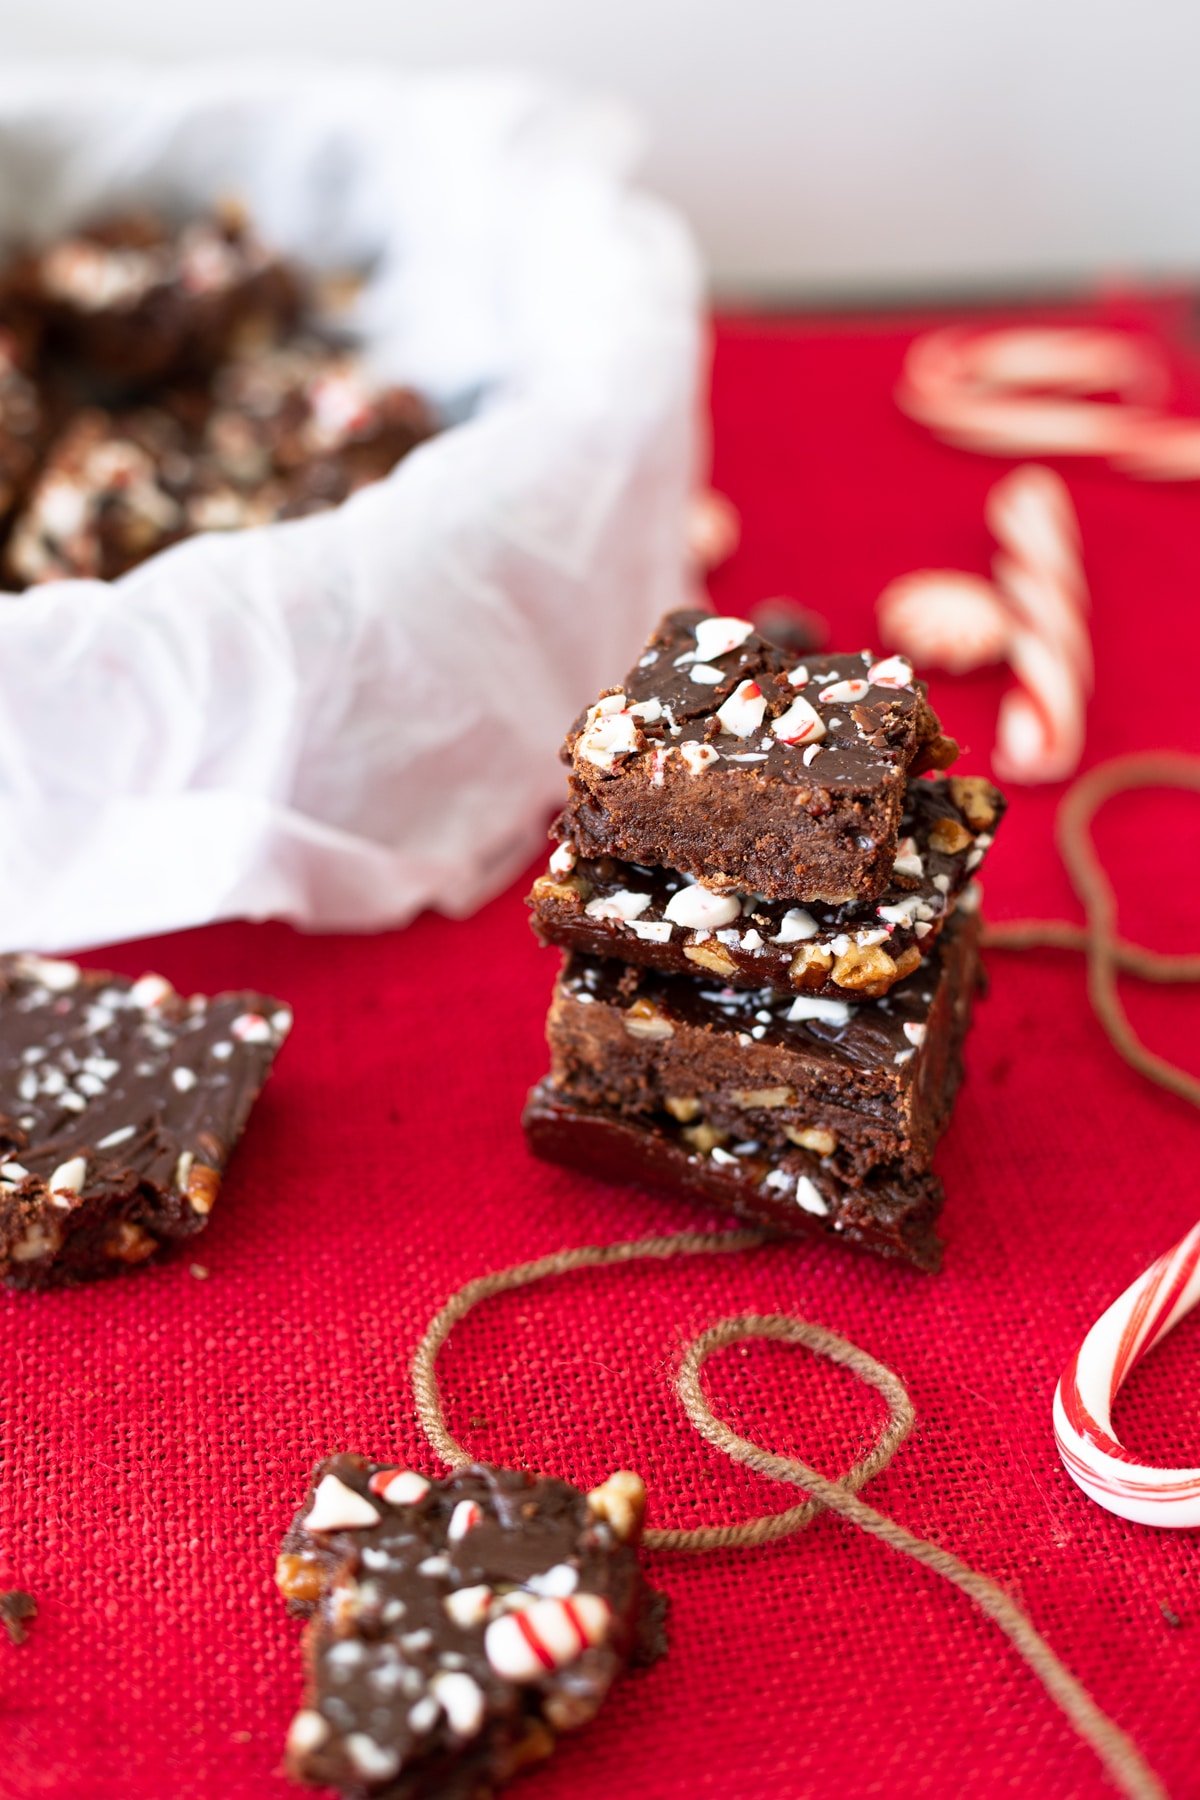
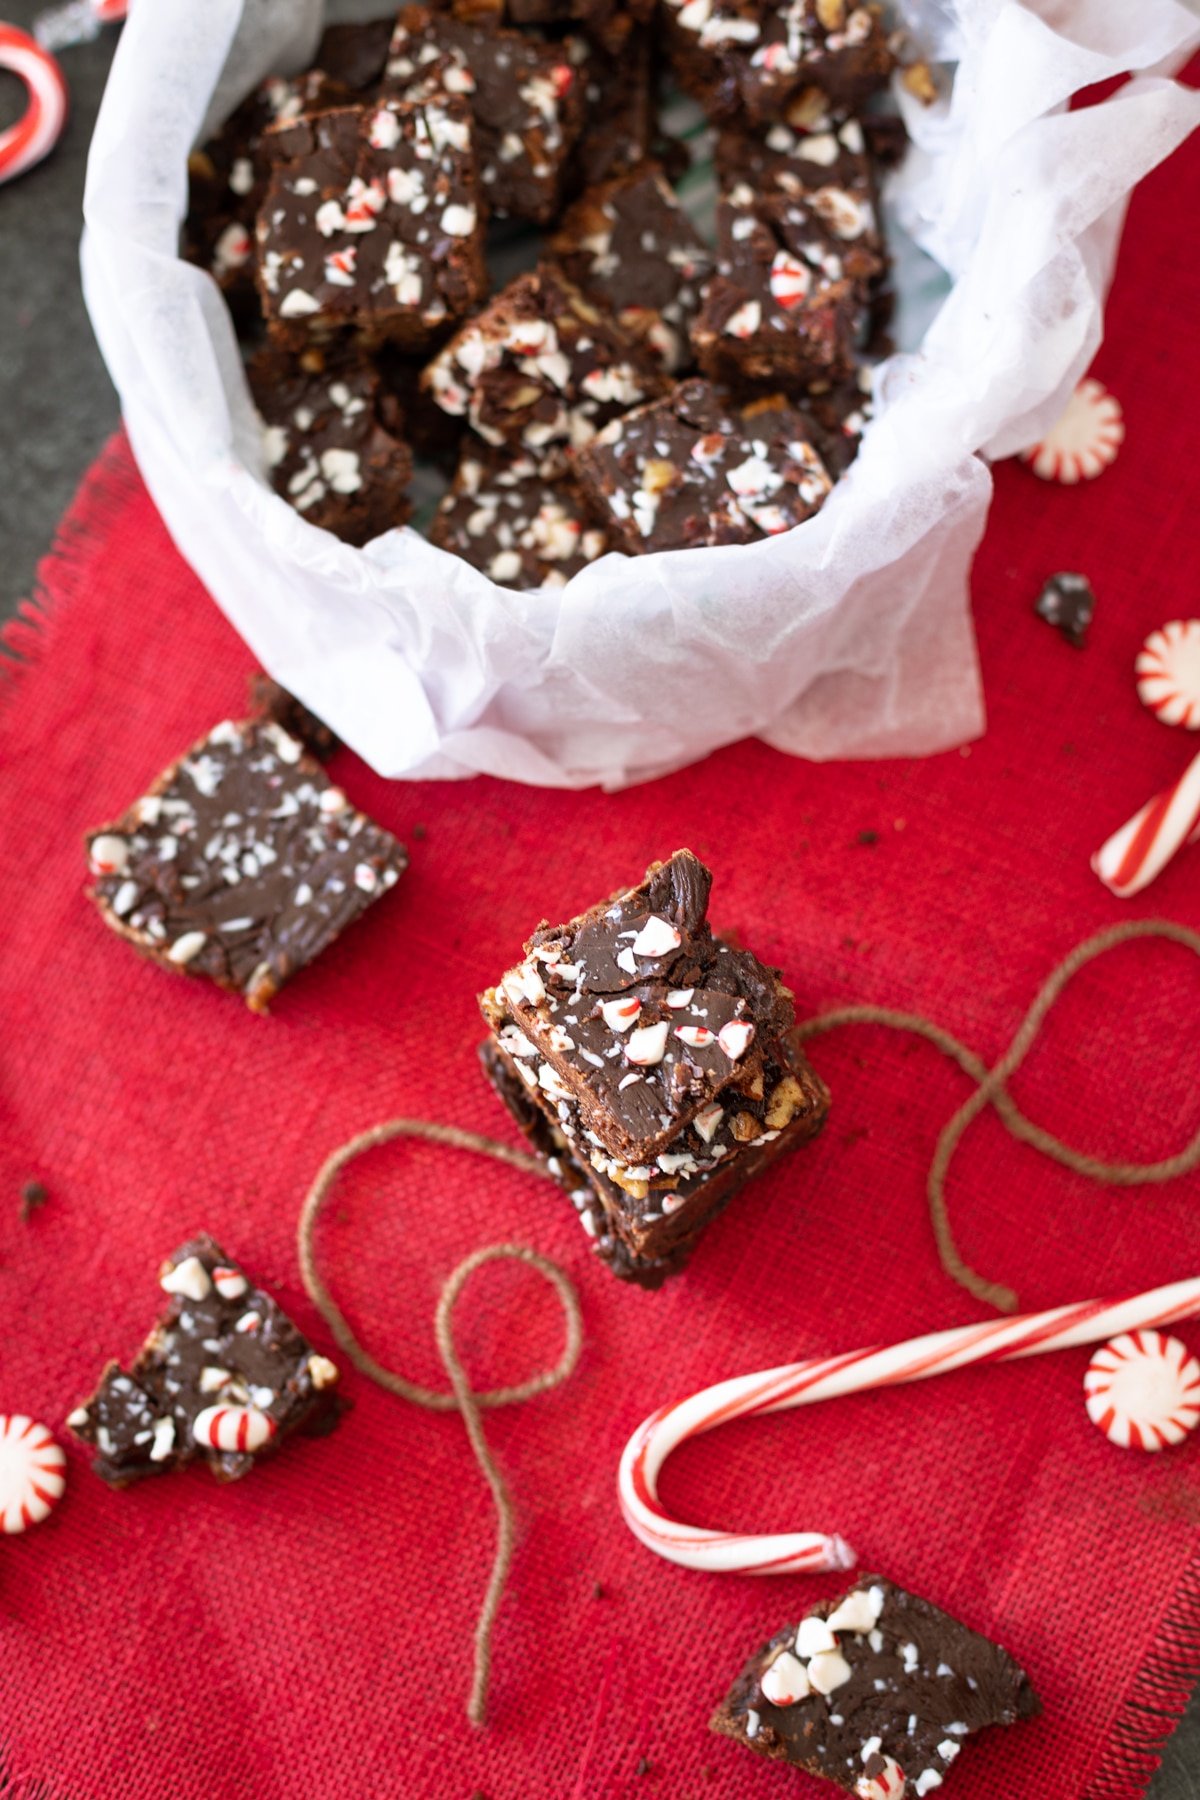
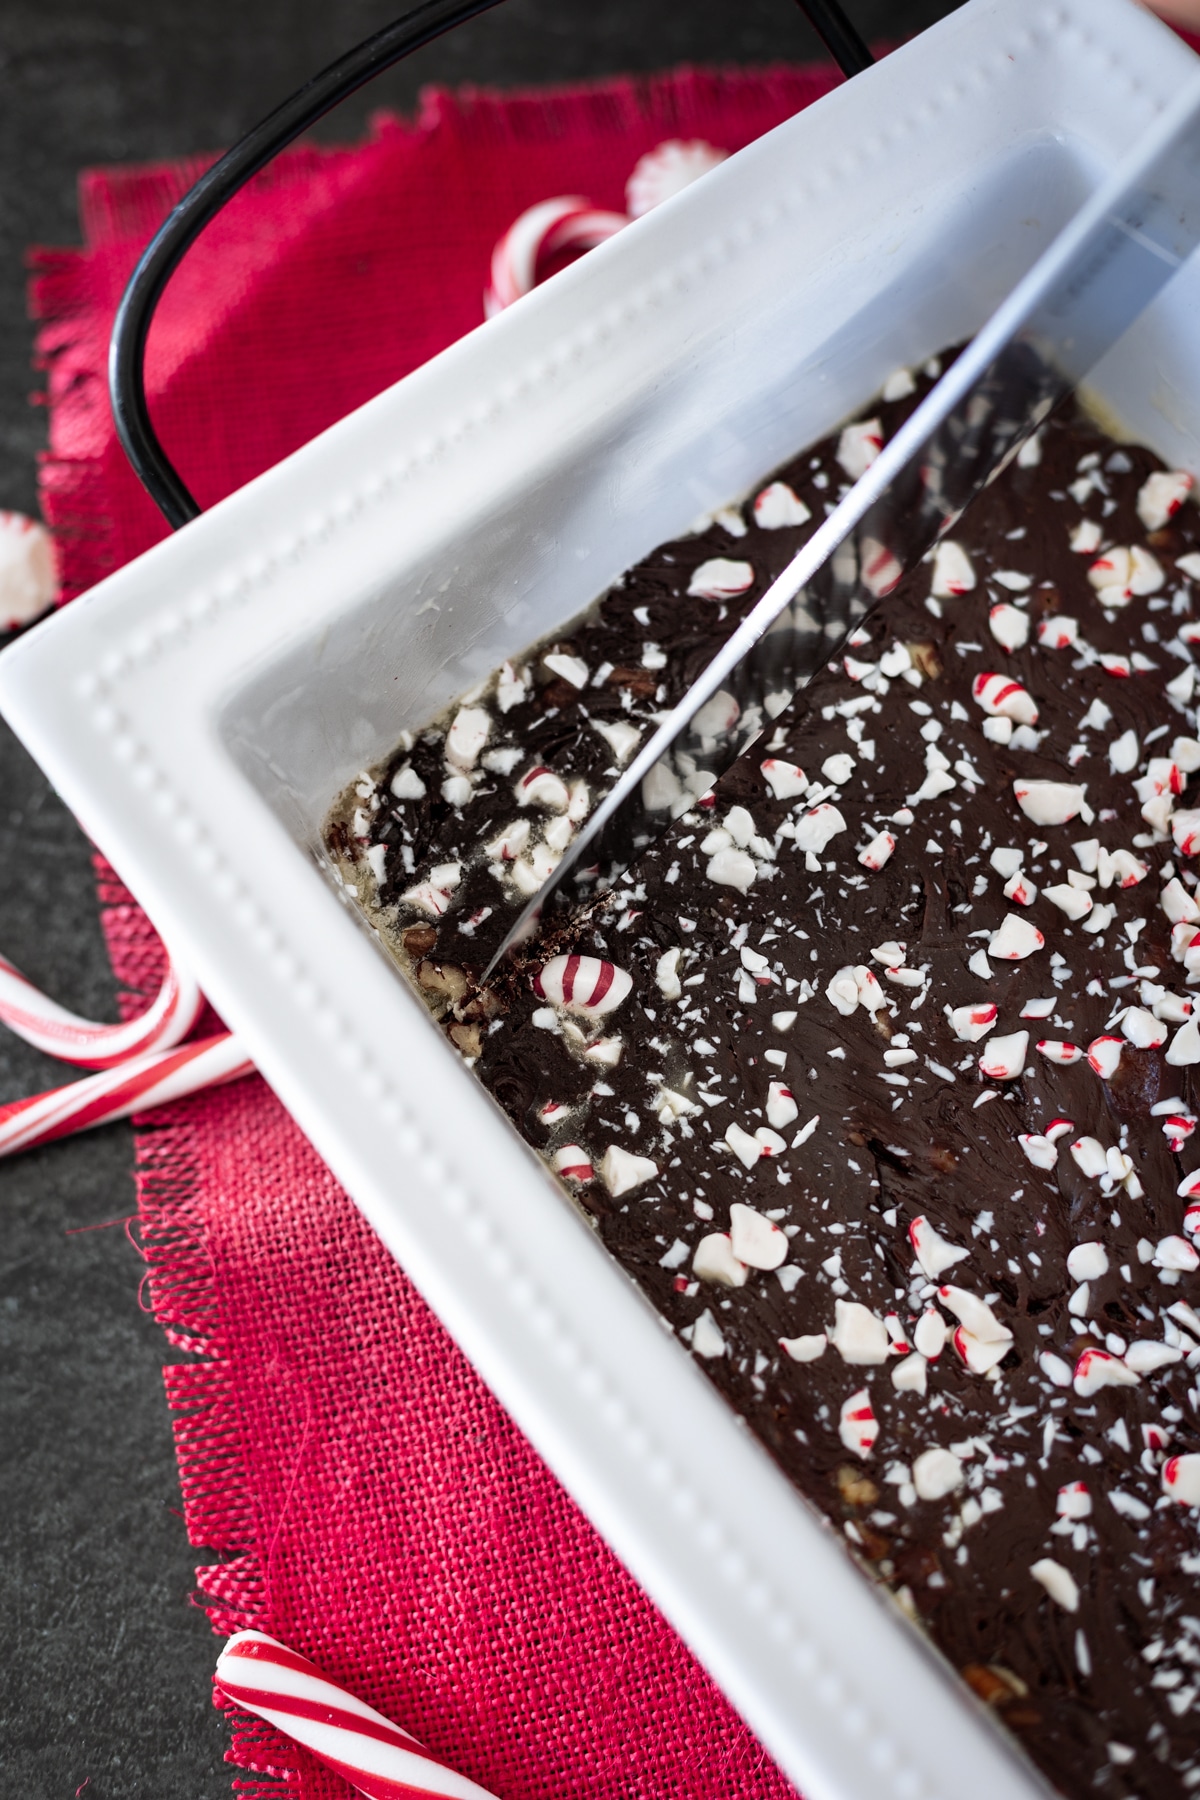
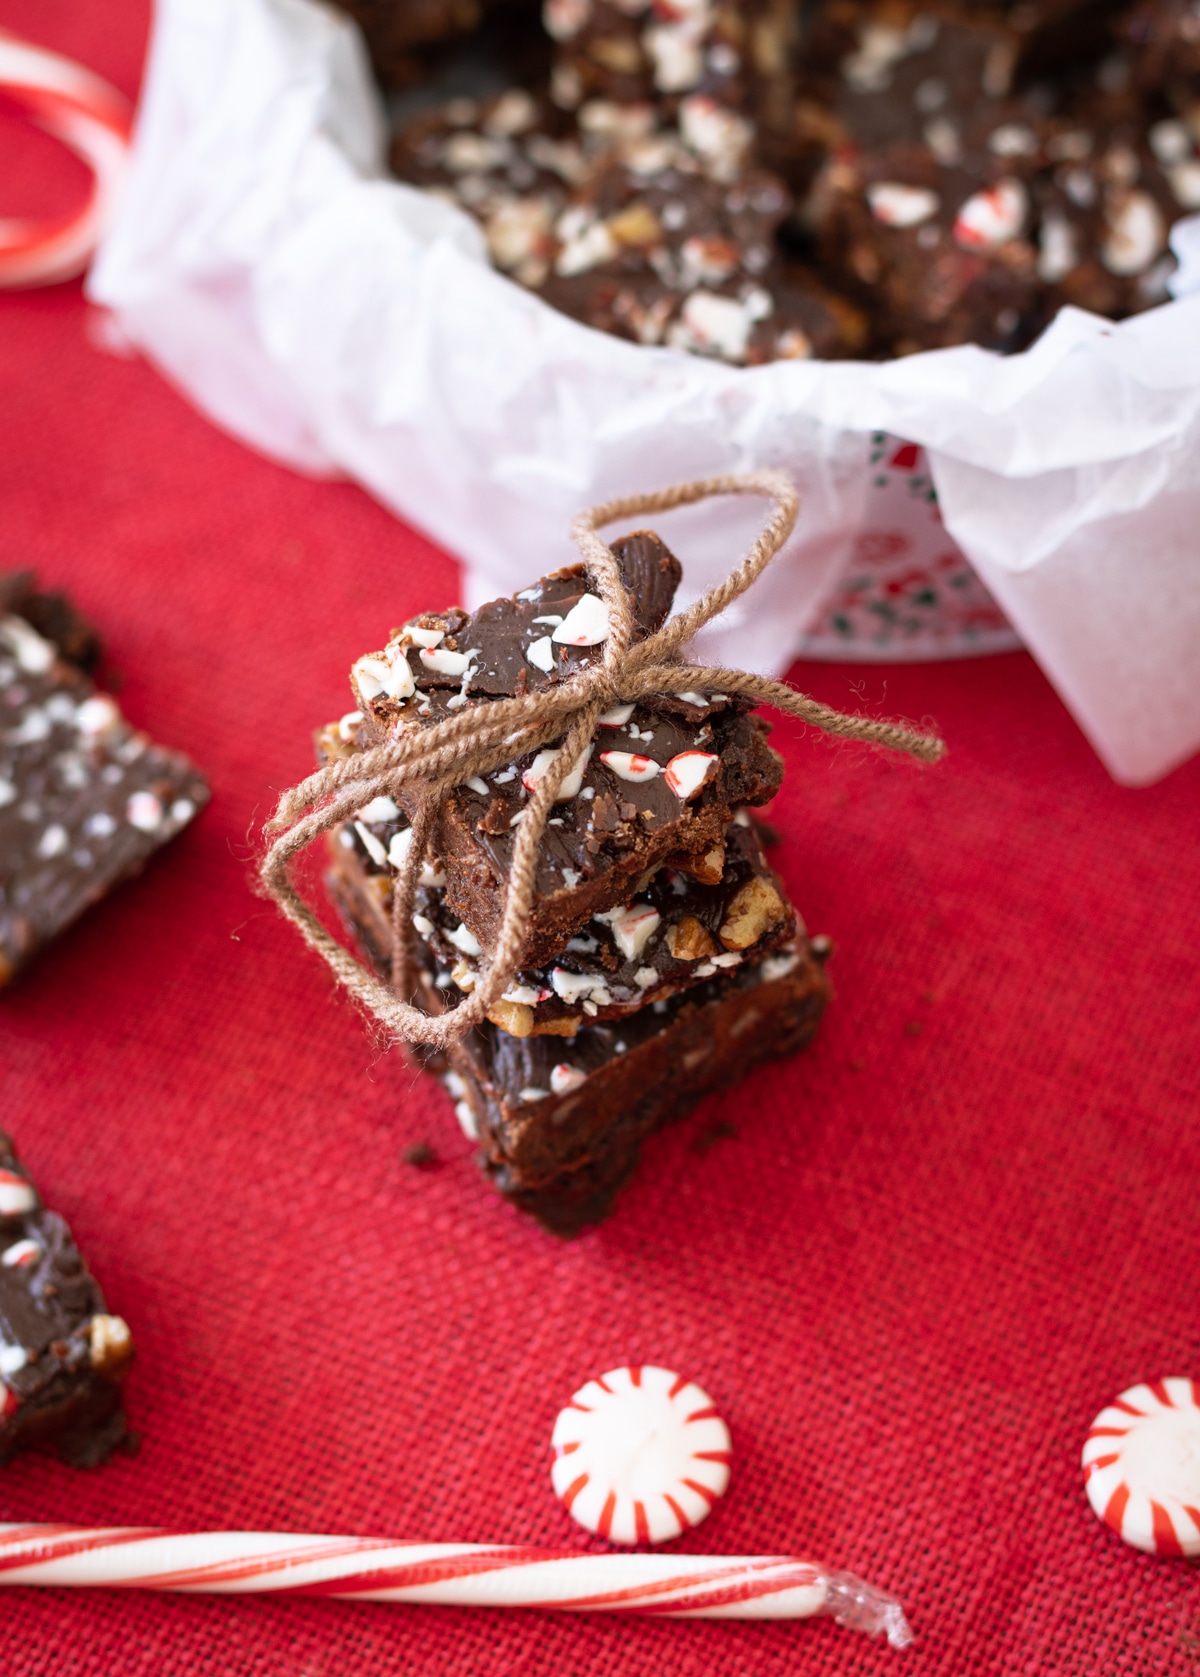
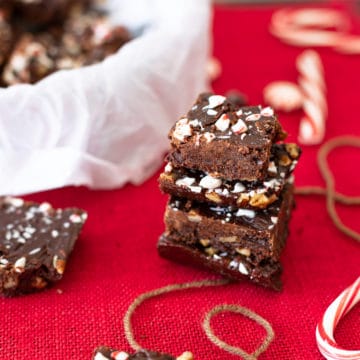
Once the fudge has cooled, about 2-3 hours later, cut into squares. Cover and store at room temperature.
📖 Additional Recipe Variations
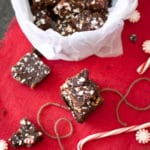
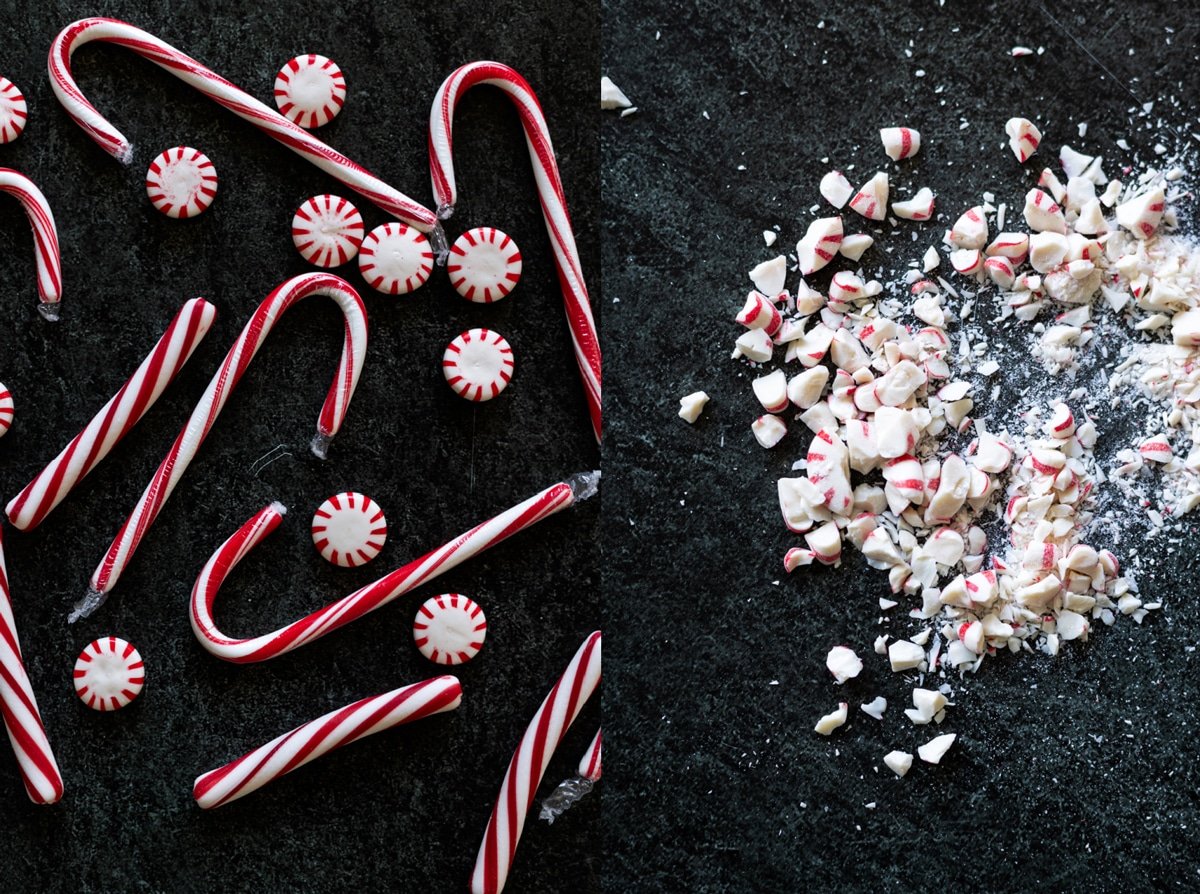
I love adding crushed peppermint on top of this fudge recipe. I also like adding chopped pecans, but chopped walnuts also work really well. For an extra crunch, you can add the nuts and the crushed peppermint into the chocolate before mixing. This will add a more robust mint flavor. If you don't like the crunch of the peppermint but love the mint flavor, skip the crushed peppermint and add ½ to 1 teaspoon of peppermint extract at the same time you add the vanilla extract. Chopped toffee is also a yummy option.
✍️ Adjustments For Different Altitudes
Just like baking, altitude plays a factor when making fudge. The Chicago Tribune has done one of the best write ups I've ever read about how to adjust the temperature depending on your altitude. They state that when making fudge at a high altitude, the cooking time will be shorter than it would at sea level due to the more rapid evaporation of liquids. If sea level instructions are followed, the mixture will be too concentrated by the time it reaches the given temperature in the recipe.
They advise you to adjust the temperature based on your specific altitude. To do this, deduct two degrees from the temperature required for every one thousand feet of altitude above sea level. For example, if you live 5,000 feet above sea level, deduct 10 degrees from 234°F. The adjusted temperature for 5,000 feet above sea level would be 224°F.
If you are having trouble with the consistency of your fudge, do a google search on what the sea level is for where you live. You might be surprised. The difference of one or two degrees will significantly affect the final texture.
🙋🏼 Frequently Asked Questions
When making candy, precisely obtaining an accurate temperature is crucial. It can make or break the candy recipe. I've had great success using a digital meat thermometer instead of using a candy thermometer. If you do not have a candy thermometer you can use a meat thermometer as long as the temperature gauge gets high enough.
For this chocolate fudge recipe, no. As a matter of fact, it shouldn't be put in the refrigerator. When cooling and storing, make sure it is being done at room temperature.
Some fudge recipes can be frozen, but I don't recommend freezing this one.
The short answer is because sugar crystals formed during the heating process. For example, if you moved the chocolate mixture at all during the cooling phase, sugar crystals can form and contribute to the grit. Keep in mind though that this is an old fashioned fudge recipe and since it contains no cream, it tends to have a finite amount of grit naturally.
💭 Expert Tips
- Do not double this recipe.
- Before you begin, you should check the accuracy of your thermometer. This step is crucial. I've ruined many batches of fudge because my candy thermometer was no longer working correctly. Place your thermometer in a pot of boiling water for about two minutes. If it reaches 212°F, it is working correctly. If it registers above or below 212°F, then adjust the recipe temperatures. For example, if the thermometer reads 210°F, then subtract two degrees from the recipe temperature. If it reads 214°F, then add two degrees to the recipe temperature.
- Don't use a metal spoon when making fudge because it will conduct heat which can affect the outcome. Using a wooden spoon to stir.
- Instead of using butter to grease your dish, line a dish with parchment paper or aluminum foil. Make sure to leave some overhang. This will make it much easier to lift out after it cools. And, it's less mess for you to clean up.
- When making this particular recipe, I've had the best luck using a non-stick hard bottom pot/saucepan.
- Measure out all your ingredients before you start making the fudge instead of doing it as you go.
- You can also try sifting the sugar to help prevent crystallization.
🍫 More Candy Recipes You'll Love!
While making candy can be frustrating, it can also be fun when you nail the technique. If you like making candy, make sure you try my Amaretto Chocolate Truffles. With a hint of amaretto, these truffles are both rich and creamy. And they are easy to make! And cracker candy is another one that is easy to make! This one is made with saltine crackers and chocolate and has a toffee base. If you like cracker bars, you'll love this easy candy recipe!
I can’t wait to hear how your chocolate fudge turned out! If you’ve tried this or any other recipe of mine on the website, make sure you rate the recipe. You can also leave a comment below! I love hearing from you! And make sure you sign up for my newsletter here!
Old Fashioned Chocolate Fudge Recipe
Equipment
- candy thermometer
Ingredients
- 3 cups granulated sugar
- ⅔ cup Hershey's cocoa powder
- 1 ½ cups milk, whole or 2%
- ¼ cup butter, unsalted
- 1 teaspoon vanilla extract
- ⅛ teaspoon salt
- ¼ cup peppermint, crushed
- ½ cup pecans, chopped
Instructions
- Start by buttering the bottom and sides of an 8-inch square baking pan with butter. Expert Tip: You can skip the buttering step altogether and line the dish with either aluminum foil or parchment paper.
- In a large saucepan, add the sugar, cocoa, and salt and stir to combine.
- Next, stir in the milk and set the stovetop burner to medium heat. Place the saucepan on the burner.
- Constantly stirring, allow the chocolate to get hot and come to a full rolling boil. Once it is at a roiling boil, stop stirring.
- Add the candy thermometer to the side of the saucepan, ensuring the bulb of the thermometer isn't touching the bottom or side of the pan.
- Let the chocolate continue to boil, without stirring, until the fudge mixture reaches 234°F on a candy thermometer.Expert Tip: If you don't have a candy thermometer, drop a small amount of chocolate into very cold water. If it forms into a soft ball which flattens when removed from the water, it's reached the accurate temperature.
- Remove the saucepan from the heat. Add the butter and vanilla extract; do not stir.
- Let the fudge continue to cool at room temperature until it reaches 110°F.
- When the fudge is at precisely 110°F, quickly stir it with a wooden spoon until the fudge starts to thicken and just begins to lose some of its gloss. Expert Tip: You only need to do 1-2 hard stirs. The fudge will thicken very quickly.
- Then, quickly spread the fudge in the prepared pan and allow to cool completely.
- Cut into squares. Cover and store at room temperature.
Notes
- Measure out all your ingredients before you start making the fudge instead of doing it as you go.
- If you use unsalted butter, add ⅛ teaspoon of salt to the recipe to slightly cut the sweetness. If you're using salted butter, there's no need to add additional salt.
- Do not double this recipe.
- Before you begin, you should check the accuracy of your thermometer. Place your thermometer in a pot of boiling water for about two minutes. If it registers above or below 212°F, then adjust the recipe temperatures accordingly. For example, if the thermometer reads 210°F, then subtract two degrees from the recipe temperature. If it reads 214°F, then add two degrees to the recipe temperature.
- Don't use a metal utensil when making fudge because it will conduct heat which can affect the outcome. Using a wooden spoon to stir.
- Instead of using butter to grease your dish, line a dish with parchment paper or aluminum foil. Make sure to leave some overhang. This will make it much easier to lift out after it cools. And, it's less mess for you to clean up.
- When making this particular recipe, I've had the best luck using a non-stick hard bottom pot/saucepan.
- To help prevent grittiness, try coating your the pot with butter before adding the sugar, cocoa, and milk.
- You can also try sifting the sugar to help prevent crystallization.
WANT TO SAVE THIS RECIPE?
Nutrition
Recipe Source: Hershey's Kitchen
Robin
Why won’t my fudge set up?
Amanda Mason
This is a very advanced recipe to make so if you are new to making fudge or candy, it may take a bit to master the recipe. Getting the temperature 100% accurate is key. Place your thermometer in a pot of boiling water for about two minutes. If it reaches 212°F, it is working correctly. If it registers above or below 212°F, then adjust the recipe temperatures. For example, if the thermometer reads 210°F, then subtract two degrees from the recipe temperature. If it reads 214°F, then add two degrees to the recipe temperature.
If it's not exact, it wont set.